Your Cart is Empty
Flex™ Mattress Owner's Manual
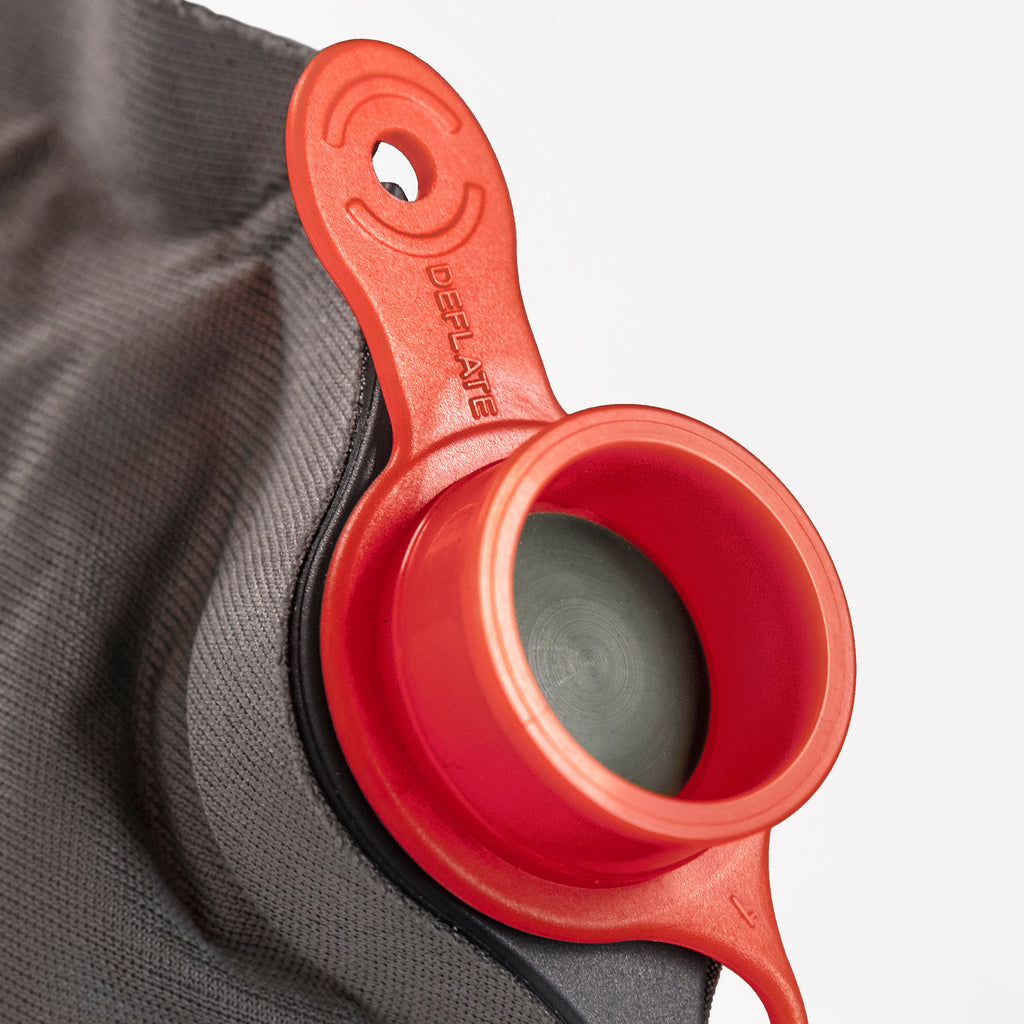
Inflating your Flex™ Mattress the first time:
Because the mattress was super-deflated right after manufacturing, it will need help inflating the first time. Inflate it using the included Inflation Dry Sack until it is very firm to fully expand the foam. Ideally, you would let it sit like this overnight to let the foam fully expand. After that, you will notice it will self inflate normally.
Storing your Flex™ Mattress:
Note that your mattress will self inflate much more quickly if, between camping trips, you store it with the valve fully open and the mattress completely flat. We understand that most people don't have the space to store it that way though. If that's the case for you, roll it up lightly (not folded) and store it with the valve open.
To inflate:
1. To get a jumpstart on inflating your Flex™ Mattress, pull the valve completely out and allow the mattress at least 15 minutes to self-inflate most of the way.

2. You can then couple the Inflation Dry Sack with the valve for faster manual inflation. Make sure the valve is inserted in "inflate" mode as shown below with the green center button facing out (the large, circular part of the green valve will be inside the mattress). Couple the Inflation Dry Sack with this red valve and then gently blow air into the dry sack and roll it down from the top to squeeze the air into the mattress. Repeat until the mattress is firm, then remove the Inflation Sack from the valve.

3. Before placing the cap on the valve, lay on the mattress on your side and push the green "button" to slowly deflate until your hip just bottoms out, so you are using the full depth of the foam. This is a great starting position to determine how firm or soft the mattress should be to work best for you. Note that most people tend to run the mattress too firm. Softer is generally more comfortable even if you sleep on a firm mattress at home. Experiment to determine what works best for you.

4. Secure the valve with the outer cap. Note: If you want to adjust the pressure after the outer cap is attached, you will need to hold the valve in place when removing the cap to avoid pulling the valve completely out.

To deflate:
1. Pull the valve completely out.

2. Loosely roll the mattress (without folding) and push out as much air as possible. Kneel on the mattress to keep the air out while you insert the "deflation" valve, the side with the large round circular part of the valve on the outside and the green button facing to the inside of the mattress.

3. Unroll the mattress and fold it in half. Tightly roll the mattress, pushing out any remaining air. Secure the valve with the outer cap.

Flex™ Mattress Repair
Accidents happen, it's alright! Follow these simple step-by-step guides to repair your mattress. Please send us a message if you have any questions. View our Warranty Policy here.
For Small Punctures -
1. Fill a tub with about 4-5" of water. Fully inflate the mattress until it is as firm as possible and close the valve. Submerge the mattress, section by section if needed, until you see air bubbles leaking out. Depending on the size of the puncture, the air bubbles may be very hard to spot. When you locate the leak, draw a small circle around the puncture hole with a marker.
(If you do not have a tub or body of water near you, you can use liquid soap or simply water to wet the surface of the fully inflated mattress. Listen and look for small escaping bubbles. When you find the leak, mark it as mentioned above.)
Congratulations! Locating the leak is the hardest part!
2. Dry the mattress with a towel and lay it out until it is completely dry.
3. Open the valve and release all the air. Apply a good amount of adhesive from the tube provided to the puncture hole. If the puncture is on the top surface of the Flex Mattress, you will need to use the tip of the adhesive tube to really push that glue down in there. The 4-way stretch fabric is thick and you need to make sure the adhesive gets down into the puncture hole.
4. Wait two hours for the adhesive to dry, then inflate the mattress once more and examine the repair. Ideally it is best to let the inflated mattress sit for 24 hours. If no air escaped in those 24 hours, you're good to go!
Optional - After you complete the repair above, if you would like to cover the dried adhesive spot we recommend using a patch of gear tape such as Gear Aid Tenacious Tape.
For Large Cut or Tear -
1. Clean the surface around the "wound". Make sure the mattress is completely deflated and laid out flat. Try to piece the two edges of the tear back together and then spread adhesive along it.
2. Two hours later, spread adhesive on the included repair patch. Place it over the cut/tear and press firmly. Wait another two hours, then inflate the mattress and examine the repair. Ideally it is best to let the inflated mattress sit for 24 hours. If no air escapes, the repair was a success.
Cleaning your Flex™ Mattress
To do an overall wash, deflate it completely and soak it in warm water in the tub. Make sure the valve is closed! You can use soap (or a light detergent) and a wash cloth to rub any dirt/marks out. Rinse the soap off and lay it out to dry completely before storing it again. You can also spot clean the mattress with soapy warm water it if that’s all that’s needed.


